Working with Rust Private Crates and your CI/CD build
Private Crates
Crates are a good feature to use your code on different projects or share it to the world. But sometimes you just want to keep it private.
Since Cargo 1.34 was released, we are able to create private crates instead of the public ones that are published on crates.io. Here we are going to give a brief introduction of what you need to do to create, push and pull your first private crate using CloudSmith.
CloudSmith Crates
Getting Started
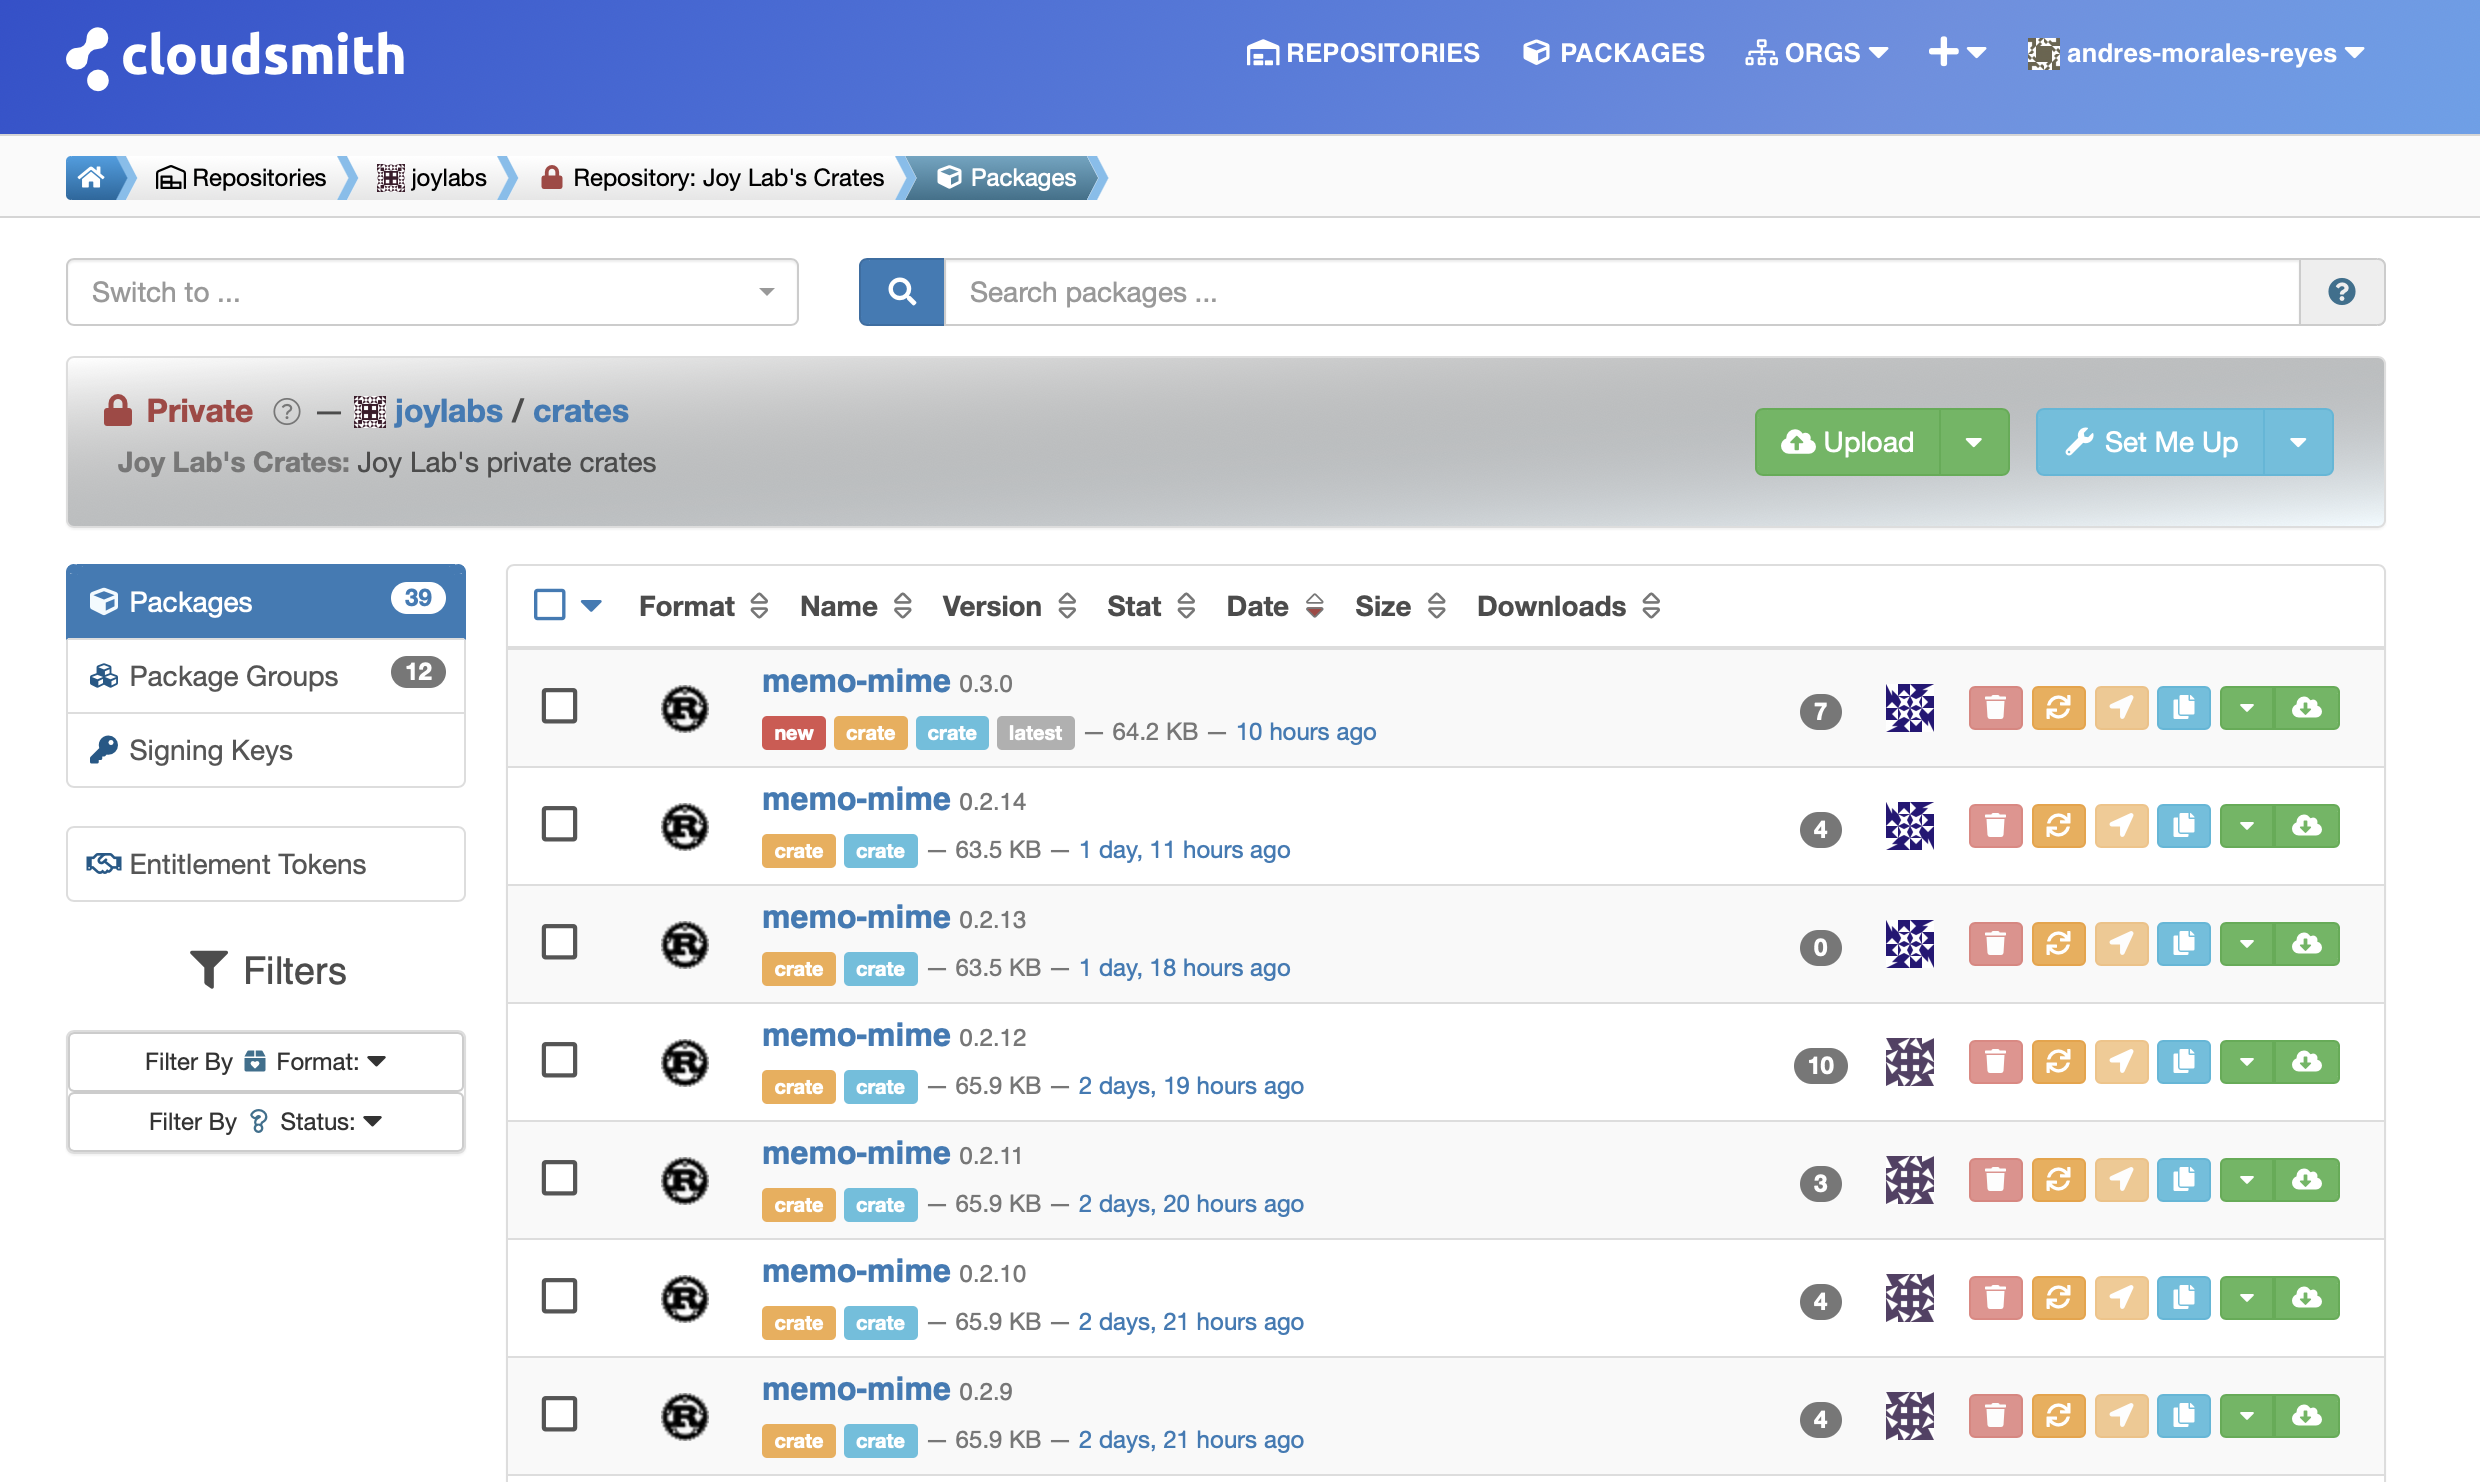
First of all if you’re working on an organization, you’ll need to be invited to it. After accepting the invitation be sure you’re added to the team, and just then, you’ll have access for uploading and downloading Crates on your org. Here is an image of how the crates page of Joylabs look like:

Configure CloudSmith for Private Repositories
For accessing a remote repository over HTTP we’ll be using git, because that’s what is used by cargo [1]. For doing that you’ll need your API key from Cloudsmith and run the following commands:
CLOUDSMITH_API_KEY=your-cloudsmith-token
git config --global credential.helper store
echo "https://token:${CLOUDSMITH_API_KEY}@dl.cloudsmith.io" > ~/.git-credentials
Download the Cloudsmith CLI
Now you’ll need to install the CloudSmith CLI, and you can do it this way:
pip install cloudsmith-cli
NOTE: You’ll need to install pip first
- Publish A Crate
Now in the project you want to publish, use the following steps to create your crate an push it to CloudSmith privately 🤩:
-
Increment the version of your library in Cargo.toml (We suggest each time you push new changes to have control over the project versions).
[package] name = "grpc_hello" version = "0.1.0" //here you update the version authors = ["Joylabs Engineering Group <engineering@joylabs.com>"] edition = "2018" -
Create a folder called
.cargowith a file namedconfigand paste the following:[registries] joylabs-crates = { index = "https://dl.cloudsmith.io/basic/joylabs/crates/cargo/index.git" }For more info on cargo Registries check [2].
-
Create the binary (the package is generated on the target folder).
cargo package --allow-dirty -
Push your binary to Cloudsmith
cloudsmith push cargo joylabs/crates target/package/{PACKAGE-NAME-X.X.X}.crate -k {YOUR_CLOUDSMITH_API_KEY}
You can also follow this instructions on this video tutorial
Congratulations now you have your first private crate on CloudSmith ready to be pulled!
- Pulling A Crate
Now for pulling a crate that you already have on your CloudSmith repository, follow the next steps:
-
Be sure you have configured your git authentication, and you have access to CloudSmith (See above).
-
Now, like you did previously when pushing, in the project where you want to use your private crate, you’ll need to create a directory called
.cargowith a file namedconfigfor getting the crates from our registry. Here is the file content:.cargo/config
[registries] joylabs-crates = { index = "https://dl.cloudsmith.io/basic/joylabs/crates/cargo/index.git" } -
Then you’ll need to change on your
Cargo.tomlfile, the crates you’re going to update, from this:Cargo.toml
rust-logger                 = { path = "./external/rust-logger/rust-logger" }
rust-logger-middleware      = { path = "./external/rust-logger/rust-logger-middleware" }
To this :
rust-logger                 = { version = "0.1.2" , registry = "joylabs-crates" }
rust-logger-middleware      = { version = "0.1.2" , registry = "joylabs-crates" }
NOTE: Remember to verify the crate version on CloudSmith.
-
Next if you’re using docker, you’ll need to have git installed to your container, so you can authenticate it. For that, add to your
RUNfield to yourDockerfile:Dockerfile
apt-get install -y git-all && \ git config --global credential.helper store && \ touch /root/.git-credentials && \ -
Now, for the Cloud Build file, you need to to save the API key on the .git-credentials file as we did it locally at the beginning of this post. Be sure that this step is before you pull the dependencies:
cloudbuild.yaml
- name: "gcr.io/cloud-builders/gsutil" entrypoint: "bash" args: - "-c" - | echo "https://token:$$CLOUDSMITH_API_KEY@dl.cloudsmith.io" > .git-credentials secretEnv: ["CLOUDSMITH_API_KEY"] -
As you can observe in the last step we use the
CLOUDSIMTH_API_KEYenvironmental variable. This variable needs to be defined on the secrets field of your cloudbuild file like this (this field is normally in the last part of your file):cloudbuild.yaml
secrets:
- kmsKeyName: "projects/build-pipeline-1/locations/global/keyRings/cloudbuilder/cryptoKeys/service-account"
    secretEnv:
    CLOUDSMITH_API_KEY: "XiQAUcsuTfEiOROMfn2PnBT+32atFkSaIQhKsCV6NP7LqEhvrqMSUQAKymd5fIgt/cRm1VTne8NAlVaij5Dvs5mNSo++iyqOvKMlha8d4UpskOfoj6o7EF+BRKX76b/4Q5JaW8Q8VIj74YcPTFnSpe9vKabdv5nNNQ=="
This section, define the encrypted value, and the CryptoKey to decrypt it. In this case the encrypted value is the CLOUDSMITH_API_KEY, and the CryptoKey is specified on the
kmsKeyNamefield in the next way [3]:[PROJECT-ID]/locations/global/keyRings/[KEYRING-NAME]/cryptoKeys/[KEY-NAME] -
Then, in the step that you run your build, you need to change from something like this:
cloudbuild.yaml
args: ["run", "build", "bin/docker/build"]To this:
args:
  [
   "run",
    "-v",
    "/workspace/.git-credentials:/root/.git-credentials",
    "build",
    "bin/docker/build",
  ]
This last modification has the purpose to bind mount a volume. It is really important to have it because you need your credentials on the
/workspacedirectory, which is the working directory of Cloud build. If you omit this modification, you’ll get a lot of trouble, passing the build randomly. -
Finally, on your docker-compose file, add the bind mount on the volumes section so it works locally:
docker-compose.yaml
Add this line to the :
volumes:
  - ~/.git-credentials:/root/.git-credentials
All right, now you’re able to push and pull your private repositories on your project, cool!